Estimated reading time: 5 minutes
The use of social media is an effective way to promote your business. As such, one of the best ways to connect with your target market and build a following for your company is to create a Meta Business page.
Meta, previously known as Facebook, gives you an opportunity to show a “face” and “personality” to your brand. Given that the page represents your company, genuine communication, one-on-one conversations, and non-business interactions on your page show the human side of your business.
Aside from building a community, a Meta Business page is good for your SEO as you are directing traffic to your website by sharing posts and links – which can give you an SEO boost if they are indexed by the search engines.
What you need before setting up a Meta Business Page
1. Essential information
You will need the basics such as a page name, a short description of your business, and some graphics for your profile and cover photo.
- Your profile photo can simply be your logo.
- The cover photo can be a general slogan or a specific banner if you’re having some special sales or other events. The design should align with your brand and your site’s design.
It’s best to fill up as much information as you can when you’re setting up so that any potential customer that stumbles upon your page can find the information they’re looking for. Some of the most important are:
- Contact information
- Location
- Business hours
- ‘Your story’ (A longer and detailed description for your business)
- Call to action (The default is ‘Send message’, which will take the person to Messenger and allow them to chat with your page. If you want to drive them to your website or webshop, you can select ‘Learn more’ or ‘Shop Now’.)
2. A main goal for your page
Before you start your Meta Business page, it’s good to have a goal for it so you’re able to design your posts around that.
Is your goal to get people to visit your site when they see you on Facebook? If so, then sharing links within your posts will be a great idea. This way, if it captures their interest, they can easily click the link as opposed to having to search for your website and find the content there. Link posts also let you add more information to the post—a caption, headline, and a link description.
If your goal is to simply raise awareness for your brand, then normal static images will do. Check out the sample below:
Remember to add URL parameters so that you can measure how much of your traffic is coming from your Facebook page. Here’s an example of a link with URL parameters:
https://1902software.com/careers?utm_source=facebook(1902)&utm_medium=social&utm_campaign=careers
How to set up your Meta Business Page
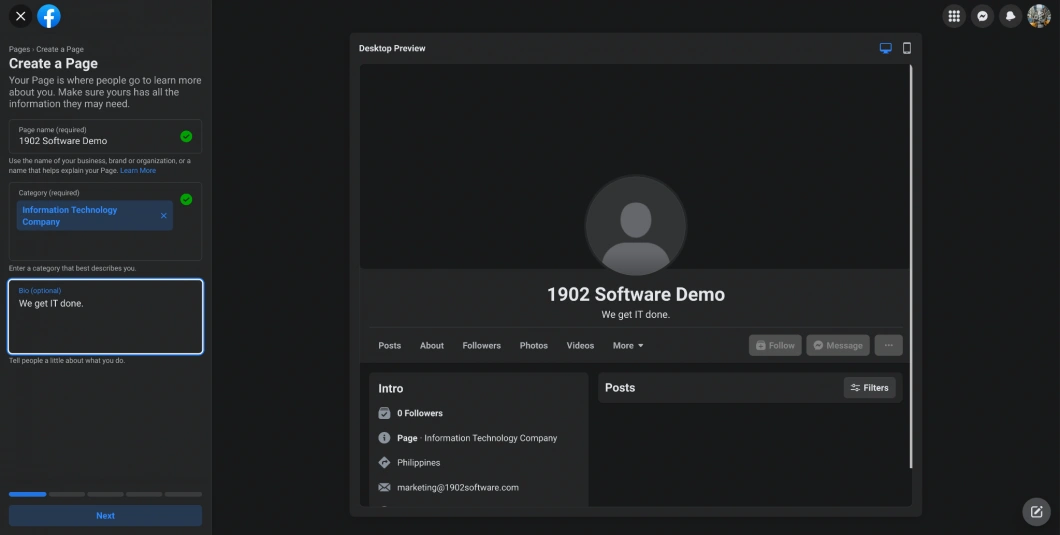
1. Log in to your Facebook account and go to Pages.
2. You will be redirected to a page where you can set up your page details. Enter your page name, choose your category, and create a bio. On the right side of your screen, you can see what it looks like in the desktop and mobile view. Once done, click “Create Page” or “Next”.
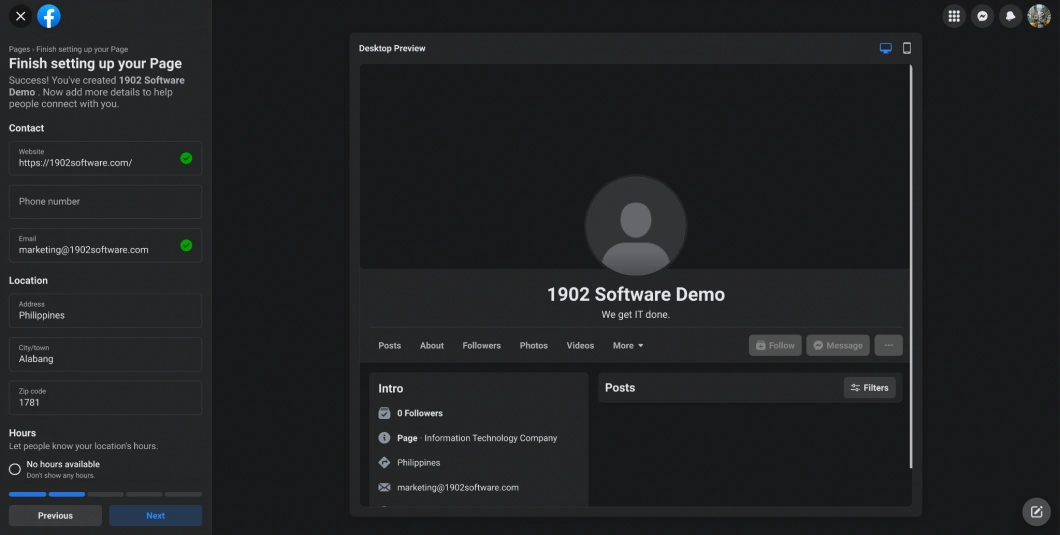
3. For the next step, you will finish setting up your page by adding more details about your business profile.
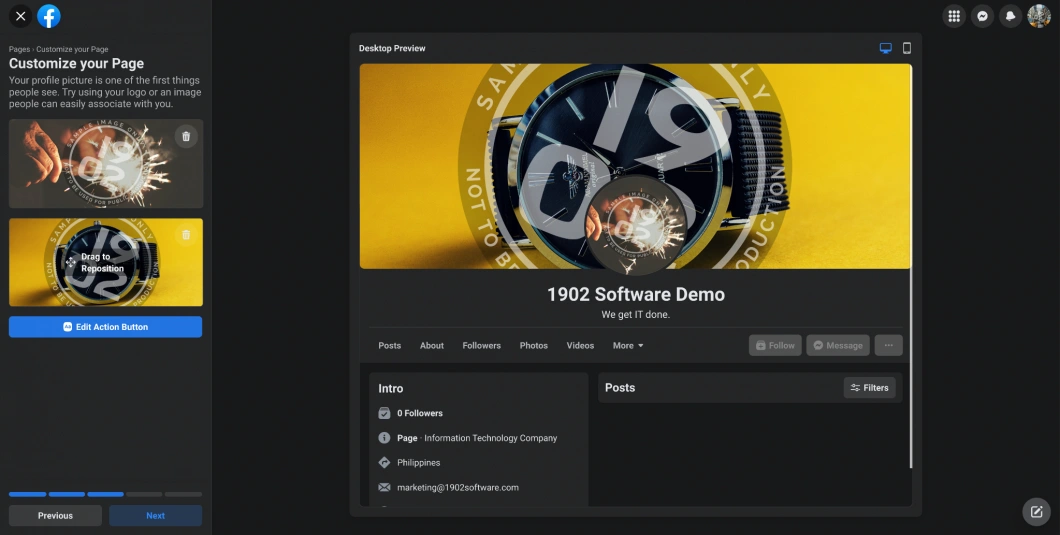
4. Make your page stand out by adding a profile picture and a cover photo. You can also add a call to action button. By default, the call to action button is “Send message”.
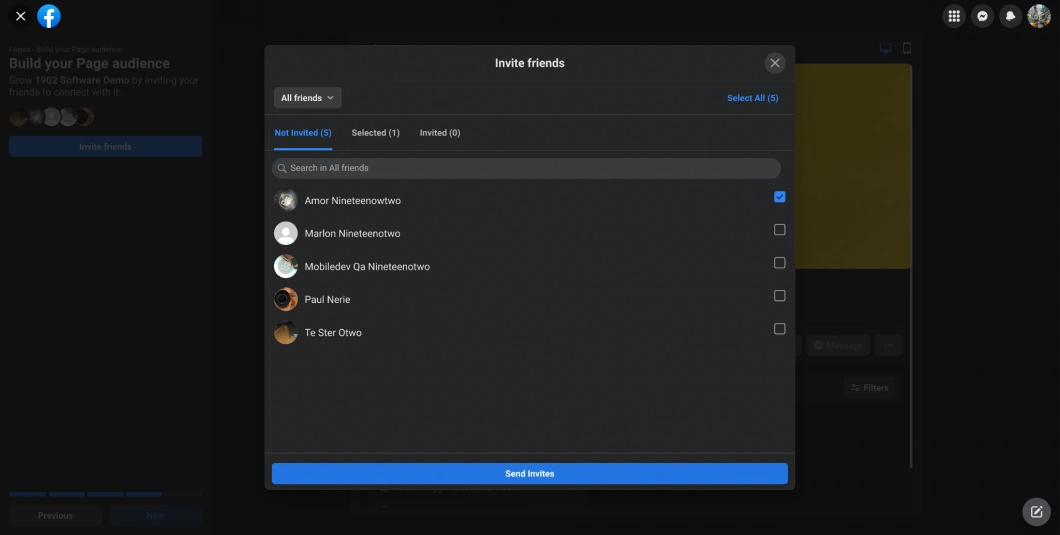
5. Start building your page audience by inviting people from your network.
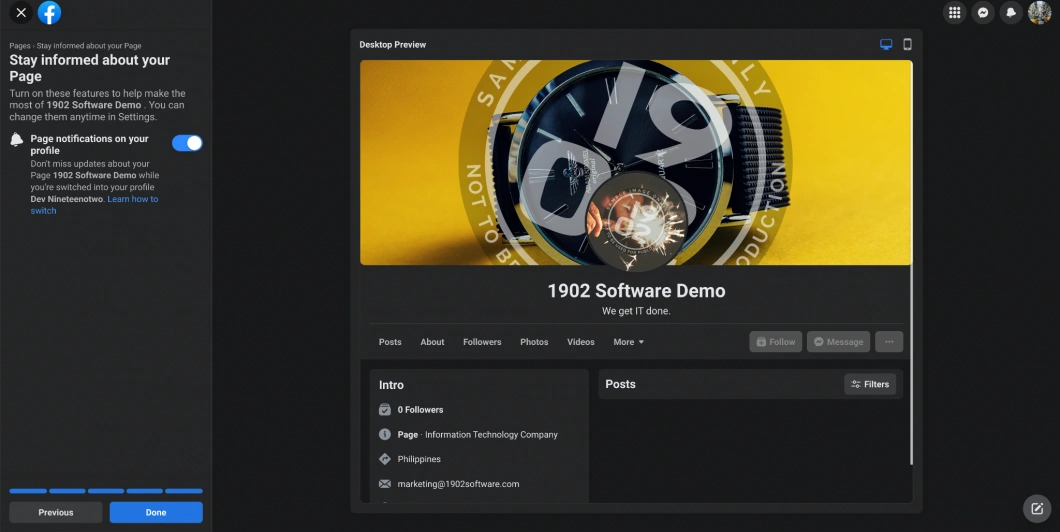
6. Finally, we recommend you turn on your notifications for your page so you stay updated of the interactions on your page. Click done and you finally have your Meta Business page.
After creating a Meta Business Page
Once you’re done with the steps above, it’s time to start posting and improving your page so it achieves the goal you intend for your business.
Posting schedule
For the first few months after you’ve created your page, you will be experimenting a lot so that you can gather enough data. There is really no one-size-fits-all standard for this, because it will largely depend on your audience.
We recommend posting once a day for at least the first month if possible, so that you can accurately gauge:
- What days of the week do you get the most engagement? (‘Engagement’ is any action done by a person with your post—like, comment, share, like page, message, etc.)
- What time period is your audience most active? Is it mornings, lunch break, or at the end of the workday?
It would be best if you can line up your posts as early as now so that you don’t have to scramble around for something to post every day. There are automatic post scheduling tools available, but you can just as easily keep your posts in a sheet and just set aside a time every day to post.
Professional dashboard
This feature allows you to get an insight into people’s engagements with your page. You can see how many people a certain post has reached and how many engagements it received. Based on this information, you can modify your social media plan.

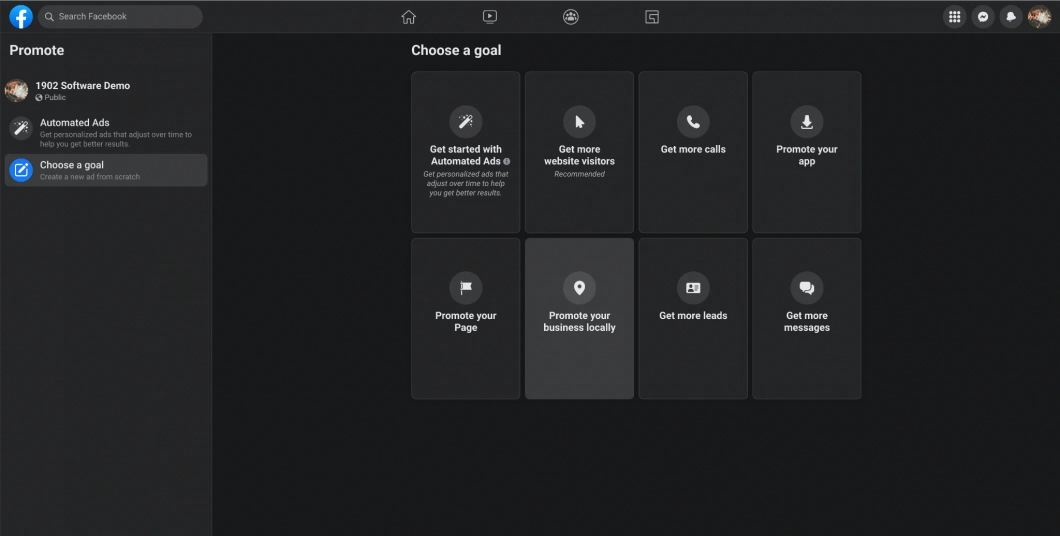
Promotions
You can also start promoting your page to help it reach a bigger audience. Choose a goal and set up your ad creative, audience, budget, and the duration you would want your promotion to run. Make sure that your audience, budget, and duration fit your desired goal so you reap the most out of your promotion. Finally, set up your payment method and submit your ad.